Notes and Equipment

Really useful things to have wherever you brew coffee:

  • Digital scales
  • Notepad and pen
  • Thermometer
  • If possible – good quality burr grinder

There are loads of different ways to brew coffee. None is better than the other but they can deliver quite different results. Equipment ranges massively in size, cost and complexity but you can make as beautiful a cup of coffee with a £5 cafetiere as you can with a £800 espresso machine, you just have to understand the difference in what they produce and how to get the best result from that method.

Water

If you don’t like the taste of the water you’re using to brew, you won’t like any drink you make with it. If you can filter your tap water e.g. using a jug with a filter that will definitely help. 

Strength

The strength of a cup of coffee depends on the ratio of coffee to water. While robusta is higher in caffeine than arabica and within arabica there are varietals that are naturally (or bred to be) higher in caffeine, the vast majority of what we term speciality coffee has similar levels of caffeine. 

Understandably some people reference the 1 to 5 scale commonly found on packets of coffee in supermarkets when describing what they like. However this scale isn’t based on an industry-agreed strength or roast profile metric so actually doesn’t mean much when you compare one coffee to another. There are huge variations in taste due to varietal, process method, roast profile and brew method and one coffee can certainly taste ‘stronger’ or have more presence in the cup than another.

The ratio of coffee to water and the way you brew your coffee will have the most impact on the strength of your drink.

Here are some of the most popular brew methods:

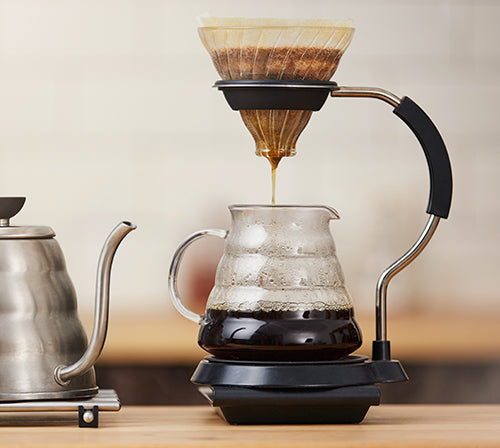
Pour over (such as a V60, Kalita wave etc.) brewing is where coffee has the least time brewing which results in a light but clean and crisp drink. This is the perfect way to showcase a bright, complex but delicate single origin coffee. There are lots of pouring recipes knocking around, this method does take time, patience and some practice but the result can be exquisite and there’s a lovely element of mindfulness involved in the preparation. There are lots of very affordable pour over kits on the market but you will need accurate, digital scales and a timer to get the best results.

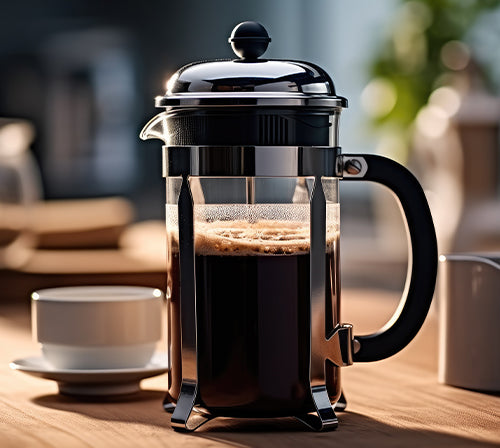
Cafetiere/French Press– a very affordable option and easy to brew with. Coffee made in a cafetiere will have more presence in the cup than a pour over as it brews in the water for four minutes or so, rather than water passing through the grinds. A great option if you like milk with your coffee and very easy to customise e.g. use more coffee and or brew for longer if you prefer a stronger taste.

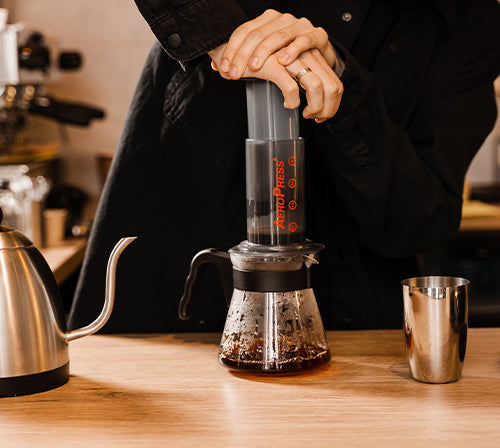
Aeropress– this very handy brewing kit can be used at home but is also perfect for taking to the office, on trips and for brewing outdoors. Aeropress works in a similar way to a cafetiere except an air cushion forces the water through the coffee. Again, this brewing method is very customisable and can result in a coffee that is somewhere between cafetiere and stove-top espresso in presence.

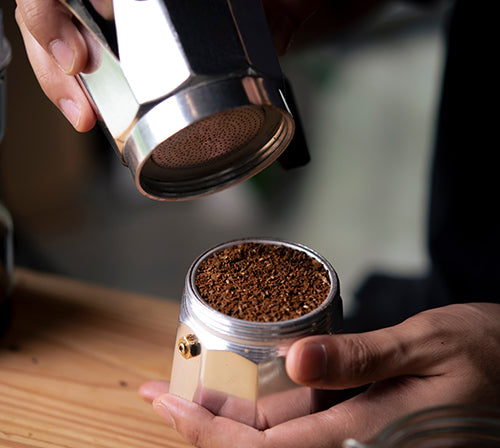
Stove-top espresso/Moka Pot– if you prefer a more intense brew but aren’t looking to spend lots then a Moka Pot is a great option. Originally designed for gas stoves, there are induction and electric stove options available. Like Aeropress these devices are great for travel too and work brilliantly if you’re brewing outdoors. To get the best results use an espresso grind however Moka Pots are fairly flexible and you can experiment with a coarser grind.

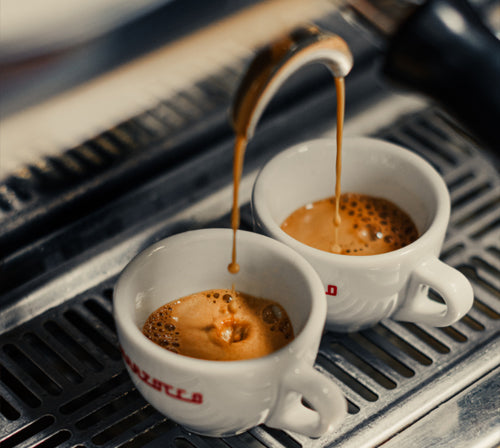
Espresso– with a ratio of approximately 1 part coffee to 2 parts water espresso gives you the strongest brew. Buying an espresso machine is an investment. There are plenty on the market ranging from ‘bean to cup’ machines which might not allow for much tinkering around with settings etc. to mini versions of commercial machines where you can really hone your home barista skills. If you’re considering buying an espresso machine it’s important to remember that many don’t have the same steam pressure as commercial versions so it can be difficult to get a consistent micro-foam when steaming milk.

Brewing

This is just a guide, a jumping off point if you’re starting with a new brewing method. It’s all about flavour at the end of the day. Feel free to experiment, change ratios, temperatures, brew time etc. to suit your taste and preferences. When working with a new brew method, it’s really useful to make notes on the coffee being produced. Try to only change one thing at a time and note down the effect:

Collapsible content

Pour over

Ratio coffee:water : 60g:1L

Grind size example: Beach sand

Water Temperature: 95

Brew Time: 2:30 mins

Notes: See below for 40:60 method

Drip Filter

Ratio coffee:water : 60g:1L

Grind size example: Beach sand

Water Temperature: 95

Brew Time: 3 mins approx

Notes:

Cafetiere

Ratio coffee:water : 60g:1L

Grind size example: Coarse sand

Water Temperature: 95

Brew Time: 4-5 mins

Notes: Try to get all grounds wet, stir coffee before leaving to brew

Aeropress

Ratio coffee:water : 60g:1L

Grind size example: Coarse sand

Water Temperature: 95

Brew Time: 4-5 mins

Notes: Try to get all grounds wet, stir coffee before leaving to brew

Stove top espresso

Ratio coffee:water : 1:10 – 1:5

Grind size example: Fine sand

Water Temperature: 95

Brew Time: 90 secs – 2 mins of perculation

Notes:

Espresso machine

Ratio coffee:water : 1:2

Grind size example: Packed brown sugar

Water Temperature: 95

Brew Time: 25 – 30 secs

Notes: Weight of espresso out & flavour is more important than shot time

Notes on Filter

Ratio
A good starting point for any filter coffee is 60g of ground coffee to 1 litre of water. If you prefer your filter stronger or lighter you can adjust the amount of coffee you’re using.

Once you’ve boiled your water, leave it to cool for around four minutes or until it’s approx 95 degrees centigrade. If you use it straight from boiling it will have an impact on the flavour of your coffee.

Pour over (V60) – 40:60 Method
18g Coffee:300g
Water at 95 degrees

Pour over brewing requires concentration and being able to do a couple of things at once. You’re looking at both the weight of water being poured in and the timer. It does take practice. Obviously if timing goes awry, the world is not going to end and who knows, you might invent a new pouring recipe!

  1. Fold seam of filter paper, open and pop into filter
  2. Wet filter paper and warm both filter and jug/cup by pouring hot water over and through the paper.
  3. Discard water.
  4. Put ground coffee into wet filter, trying to avoid too much sticking to walls of paper higher up. Tap to settle ground into a flat bed.
  5. Put coffee in filter, over jug/cup onto scales and tare.
  6. Bloom
  7. Start timer & immediately begin to pour 95 degree water in a circular motion over grounds, aiming to wet all of the visible coffee. Stop pouring when scale shows 45g. Pick up and gently swirl coffee, over the jug/cup. 
  8. 1st Pour @ 45 seconds
  9. Pour more water in circular motion, until scale shows 120g
  10. 2nd Pour @ 1:30 mins
  11. Pour more water in circular motion, until scale shows 180g
  12. 3rd Pour @ 2:15 mins
  13. Pour more water in circular motion, until scale shows 240g
  14. 4th Pour @ 3 mins
  15. Pour more water in circular motion, until scale shows 300g